Device Settings
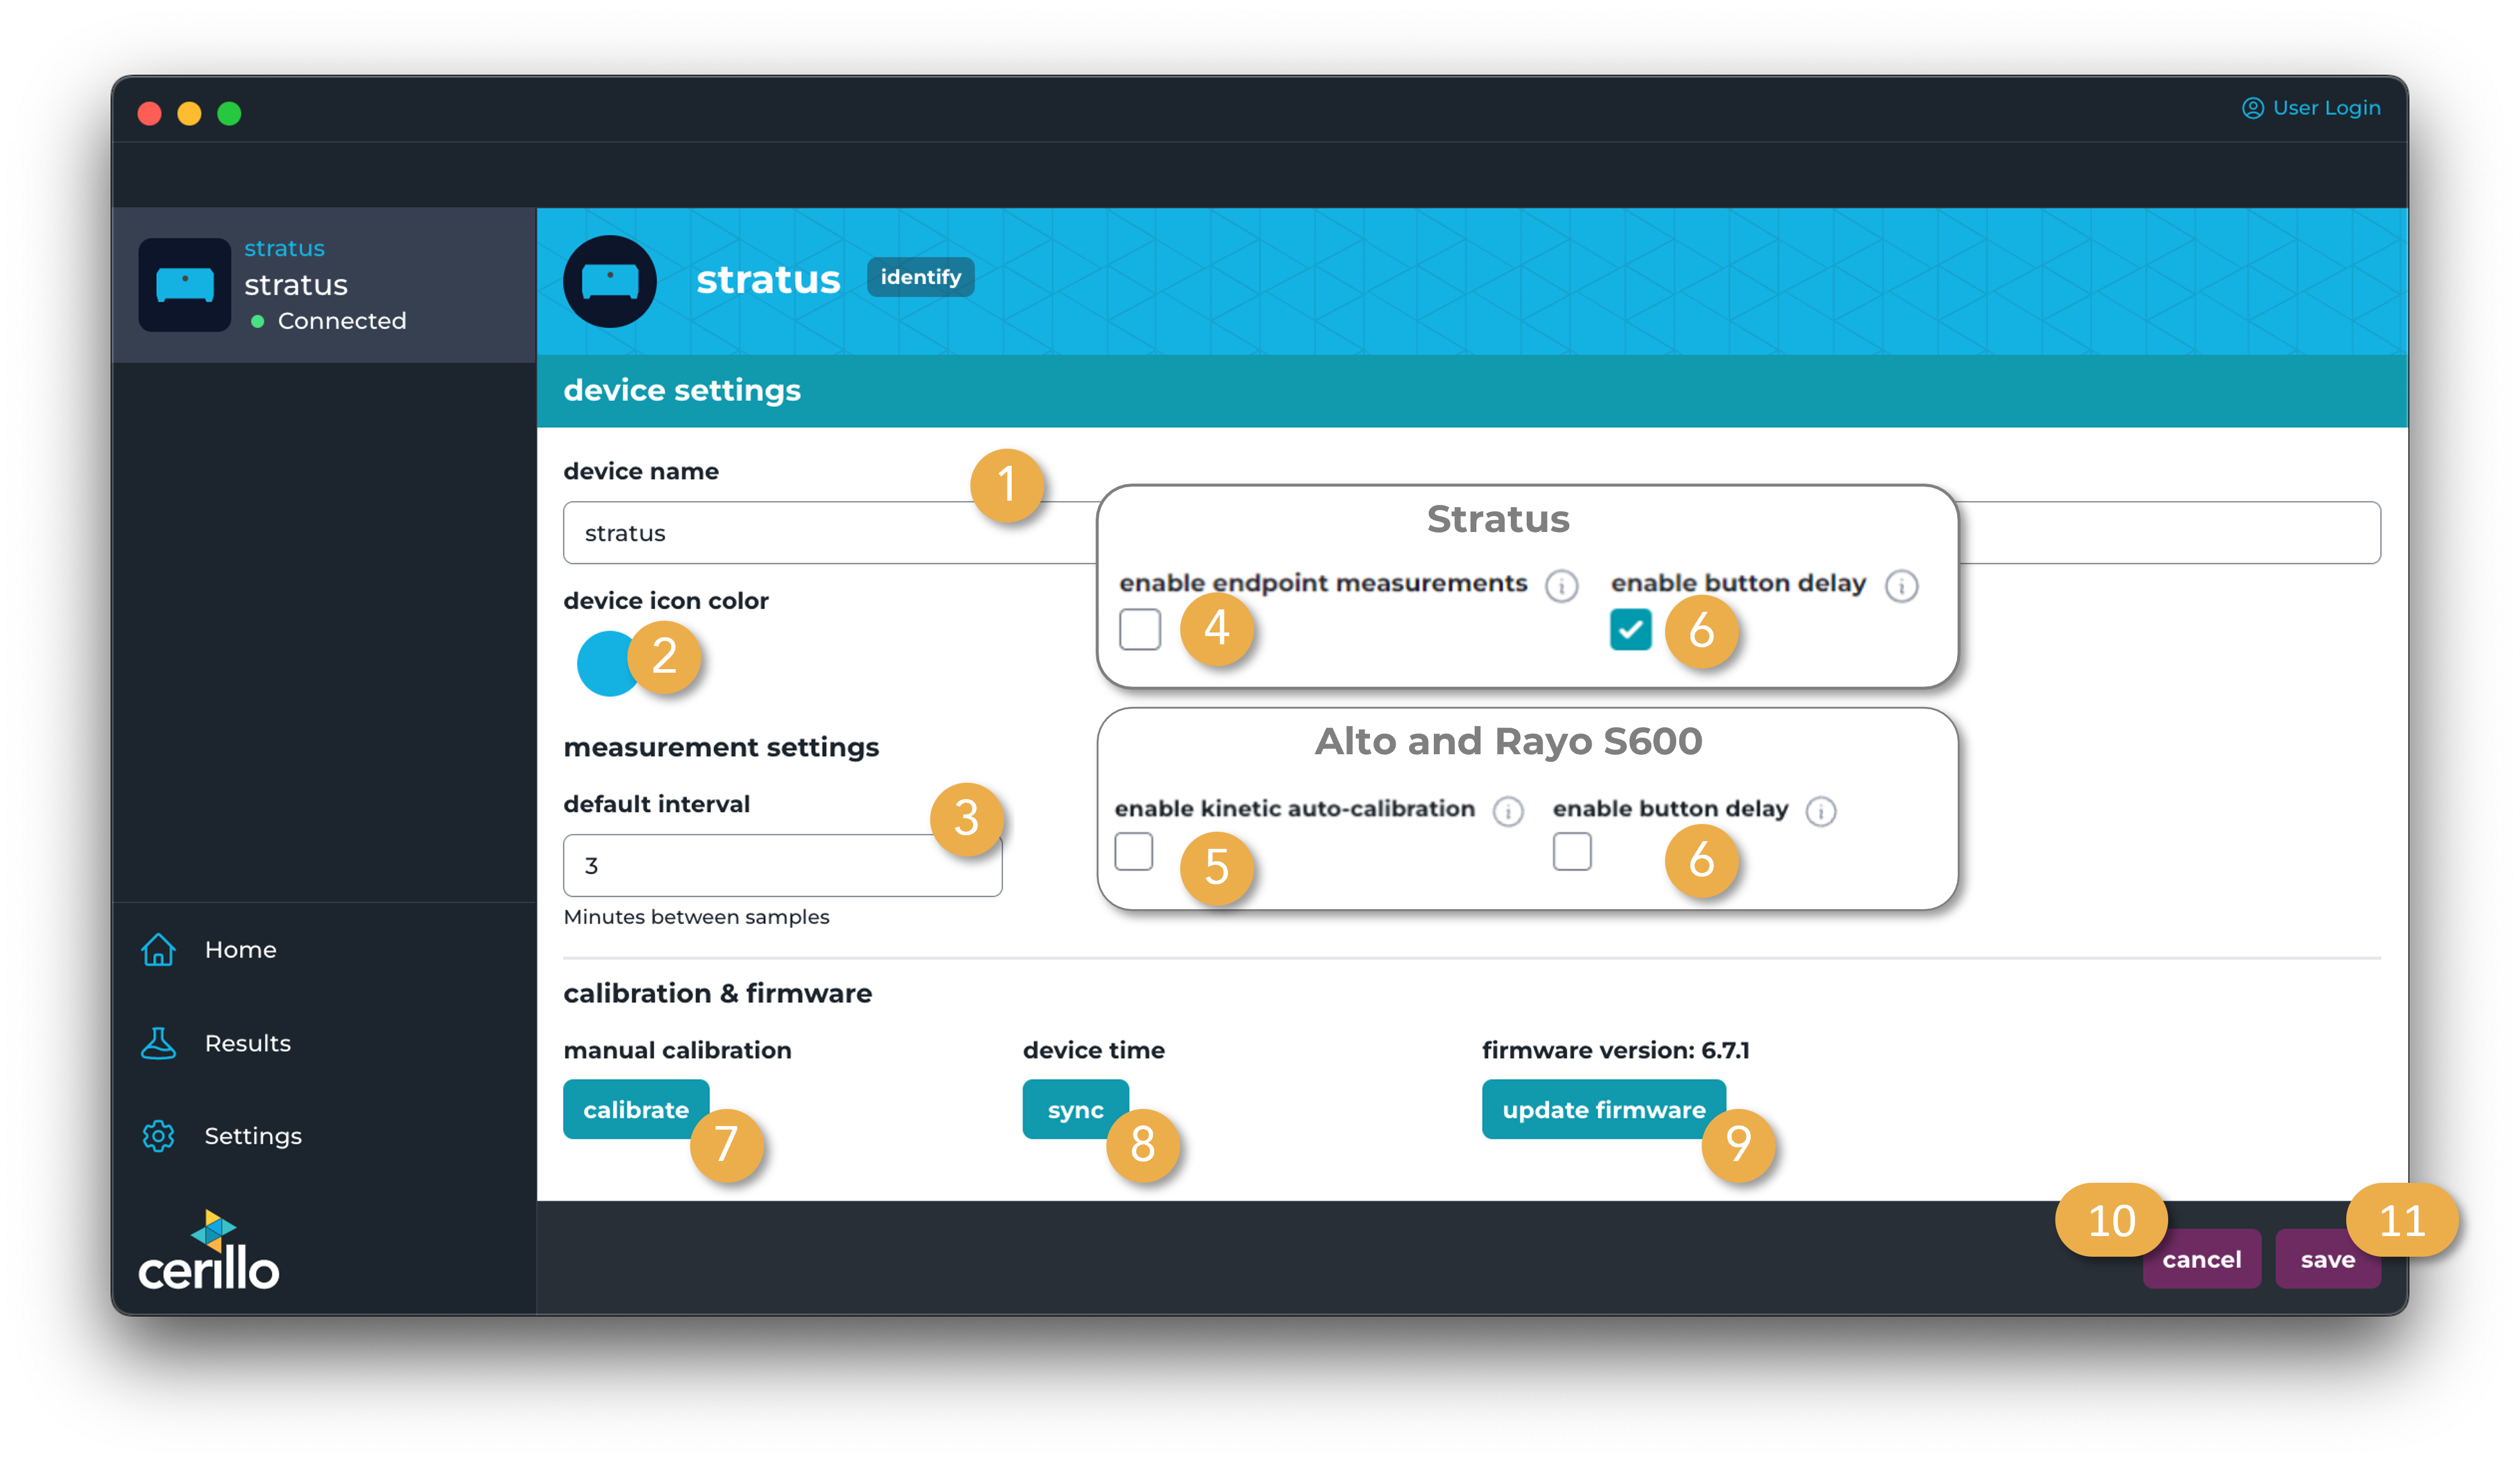
Navigate to this panel by clicking the Device Settings Button (gear) in the Device Home Page The settings available for your device may differ depending on the device model and firmware version. All devices should have a name input.
Number |
Element |
Description |
|---|---|---|
1 |
Device Name Input |
User input to set the name of the device |
2 |
Device Icon Color Selector |
Click here to bring up a color selector that will change the color of this device in the user interface. This can be helpful to easily identify different devices or to group devices together with a common color. |
3 |
Default Measurement Interval |
User input that sets the interval between reads when a user starts an experiment with a held button press application |
4 |
Endpoint Measurement Toggle |
Toggle on to enable endpoint measurements on a device which does not have them enabled by default. This will enable endpoint measurements from the device home page and from the experiment setup page. See device user manual for more detail about running endpoint experiments with on-device controls (buttons). |
5 |
Kinetic auto-calibration |
When enabled, device will auto-calibrate at the beginning of a kinetic experiment. This setting is useful if you want to zero the plate at the start of the experiment. When disabled, the device will skip this step and immediately begin reading when experiment is started. This can be useful if you want absolute OD measurements in a kinetic experiment. (Legacy Cerillo plate readers always auto-calibrate at the beginning of a kinetic experiment, and cannot be configured otherwise.) |
6 |
Button Delay |
When enabled, device will delay for 10 seconds before starting a kinetic experiment with a button press. The second before starting, the status LED will dim slightly to indicate the delay is about to end. This delay can be useful if using the reader in an incubator or shaker so that you have time to close the lid and begin shaking. When disabled, clicking the button will start the experiment as soon as the device is ready. operation |
7 |
Manual Calibration Button |
Manually calibrate the device. Useful for calibrating before a quick read operation |
8 |
Device Time Synchronization |
Synchronize device time with computer time in case the device clock drifts or if it differs from your current time-zone |
9 |
Update Firmware Button |
Opens up dialog to update the device’s firmware from a file or from the latest firmware hosted by cerillo |
10 |
Cancel Settings Changes Button |
Discards any changes to device settings made by user. Navigates to the device home page |
11 |
Save Settings Button |
Saves all user-entered settings from this form to the device’s. Navigates to the device home page |
Power Saving Mode
Some external batteries shut off when the power draw of the connected device is below a certain threshold. If you encounter your plate reader stopping mid experiment when powered off an external battery, you can turn this setting OFF to increase the power draw and keep the battery from shutting off preemptively. Note that this will decrease the amount of time the battery can power the plate reader. Increased power draw is achieved by illuminating a set of random interior LEDs when the device is idle.
To change power saving mode do the following:
Navigate to the device’s settings
Type “powersaving”
An additional checkbox labelled power savings mode will appear
Toggle to your desired state
ON (default)- power saving is on and device will not draw any more power than necessary when idle
OFF - interior emittors will turn on while idle to add additional power draw so smart batteries do not turn off when a device is idle